

September is one of the busiest months for entrepreneurs to boost their passive income stream. Wondering how? – After September comes the holiday season, the most anticipated few months that contain a series of occasions to celebrate, relax, or experience togetherness. People take long breaks from tasks and engage in travelling or shopping. Businesses of all sizes offer unimaginable deals to help all economic families get what they need without stressing over budget and affordability. Black Friday deals make people crazy, and things go viral on the internet.
When most of the enterprises engage in heavy marketing of their products and services throughout this holiday season, small and medium businesses resort to other techniques to market their offerings. They seek help from local advertisement platforms such as social media communities, newspapers, print media and affordable electronic media. The internet has also opened a new opportunity for them decades ago to publish ads on classified websites.
Typically owned by individuals who are good with technology and aim to make a living by promoting others’ needs, classified ads platforms are the silent marketer that keep the small and medium businesses booming. From discovery to store visit, phone call or final purchase – the entire journey of many customers takes place here.
These entrepreneurs remain busy throughout August and September, building their classified ads site with useful features, safeguarding their platforms, collecting all relevant ads, reaching out to their advertisers for upcoming offers and services, and planning monetization opportunities. And how do they make money?
Ways to Make Money from Classified Ads (for Solopreneurs)

Running a classified ads site doesn’t just connect buyers and sellers; it opens multiple revenue streams for solopreneurs. There are ways for single entrepreneurs to make money using the platforms by offering affordable options to advertisers:
- Pay-per-Ad Post: Charge users a one-time fee each time they publish an ad.
- Subscription Plans: Let regular advertisers choose a monthly/half-yearly/annual membership plan under which they can post a number of ads.
- Digital Ads: Sell banners or display ad space to other businesses or embed Google AdSense or similar ad distribution platforms to publish ads.
- Featured Spots: Allow advertisers to pay extra to highlight their ads at the top or in special sections where they become more visible or attract more customers.
- Claim Ads: Let businesses claim their existing listings and pay for ownership and changes.
Since solopreneurs operate with low overhead, they can keep asking prices low, making it affordable for small and medium businesses to consistently invest in ad spaces and subscriptions.
How to build a Classified Ads Platform?

Since you have come this far, chances are that you’re also curious about building your own classified ads website. You probably have been thinking about the new income opportunities, possibilities of helping local businesses gain exposure, and creating a sustainable business for yourself. But then mental roadblocks are crippling your thoughts: “I don’t know how to code… it must be expensive… what if the learning curve is too steep?”
And you’re not wrong. Traditionally, building a platform like this from scratch would require higher technical expertise, a big budget if you wish to hire a developer team for that, and months of development sprint. These roadblocks often stop solopreneurs and small business owners from even getting started.
But there’s good news: building classified ads websites can be done on a budget if you are smart enough to adapt to technical changes. If you use a platform like WordPress, building your own classified ads platform becomes easier than ever. Thanks to WordPress’s flexible ecosystem and dynamic plugins, you don’t need to be a programmer to build your own platform. All you need is the right setup, and you can skip most of the technical headaches, avoid steep learning curves, and get your site running much earlier than you can imagine.
In this article, I’ll walk you through exactly how to build a classified ads site, step by step, using WordPress and its existing tools. But I must tell you that you will need patience navigating through some advanced and highly functional tools that may frustrate you in the process. But at the end, you will get a practical roadmap that you can follow to turn your idea into a fully functioning classified ads platform.
Why Am I Suggesting WordPress?
Good question. If you’ve used multiple content management systems (CMS) before, you might wonder why I picked WordPress. There are many other options available but WordPress stands out to me for various practical reasons:
Extensive Plugins and Compatible Tools
The WordPress library is full of plugins and themes, giving you the flexibility to choose ideal solutions for your platform. Experiment with various tools and switch between options until you find the best combination.
Ready-Made and Customizable Designs
Save your time and effort designing an out-of-the-box layout, utilize a ready-made WordPress theme and various templates to elevate your visual appeal. They are also fully customizable, just tweak layouts, colors, and features to suit your needs.
Affordability and Freemium Tools
It’s one big reason; compared to building a platform fusing dedicated solutions that can be costly, WordPress is highly cost-effective. You can pick managed WordPress hosting, freemium plugins with multi-site access, and other tools that make it possible to launch a professional platform without big spending.
User-Friendly and SEO-Friendly
Updating content in WordPress is simple, even for non-technical users. WordPress is popularly known to be search engine friendly. It ensures your site performs well across devices, making accessibility the biggest strength of your platform.
Massive Support Ecosystem
WordPress powers over 43% of websites worldwide, meaning there’s an enormous community of developers, designers, and users. Whatever challenge you face, you can almost always find guidance, tutorials, or support forums to help you solve it.
In short, WordPress combines flexibility, affordability, ease of use, and a strong support network, making it an ideal choice for building a classified ads platform without getting bogged down by technical complexity.
Building Your Classified Ads Site on WordPress: Step-by-Step Guide
Before creating a classified website, make sure to have the following requirements:
- Domain & Hosting
- Download & Install WordPress
- Install Directorist (Free)
- A Classified Theme (Free)
Get Domain & Hosting
The first step to create a classified website or any kind of website is to need a domain. Purchasing a domain is not rocket science nowadays. While selecting a domain name, it is good to pick a name that aligns with or represents your business type. It is not mandatory, but it gives a good signal to search engines due to the relevancy.
You can opt out like “[YourCity]Classifieds.com.” or can choose an option that specifies a country, like “.uk” for the United Kingdom and “.ca” for Canada. Don’t get tense if the .com domain is not available. Feel free to choose from other extensions like .net, .info, .io, etc.
After the domain name, the word that comes up automatically is hosting. A reliable hosting service is crucial for keeping the website live and steady. Before considering a hosting, make sure to cross-check some points like speed, security and backup plans.
We will recommend that you get a managed WordPress hosting because they are easier to manage, beginner-friendly, and require fewer technical skills. You can start initially with a basic plan due to low traffic. However, after scaling up the traffic, you can shift to premium packages.
Purchase your domain and hosting from any reputable seller like GoDaddy, Namecheap, Bluehost, Kinsta or any other reliable providers you prefer. Whichever you choose, make sure that the customer support, user review and documentation are up-to-date.
Also Read: Driving Growth with SaaS Social Media Marketing
Download & Install WordPress
After getting your domain and hosting, it’s time to install WordPress. For creating websites, WordPress is an easy, free and popular option. Don’t step backwards with the “free” word. More than one-third of websites are built and managed with WordPress. With a beginner-friendly interface at its core, it offers lots of themes, plugins and extensions that serve as an all-in-one package. If you get stuck anywhere, it is very easy to get a solution from the vast support network.
The good news is that most of the hosting companies offer WordPress pre-installed. So, you don’t think about it so much. Furthermore, you can contact your hosting company to complete the installation process, or you can do it by yourself by following your preferred resources.
Install a Plugin to Create a Classified Website
You’ll find many plugins to create a classified website. You can select any of them, but we will be using “Directorist” for this tutorial. Directorist offers the most robust features both in the free version as well as with paid extensions. It has the highest number of active installations with 4.7 ratings on WordPress plugin marketplace. It also comes with lots of customization features and runs well with most popular page builders.
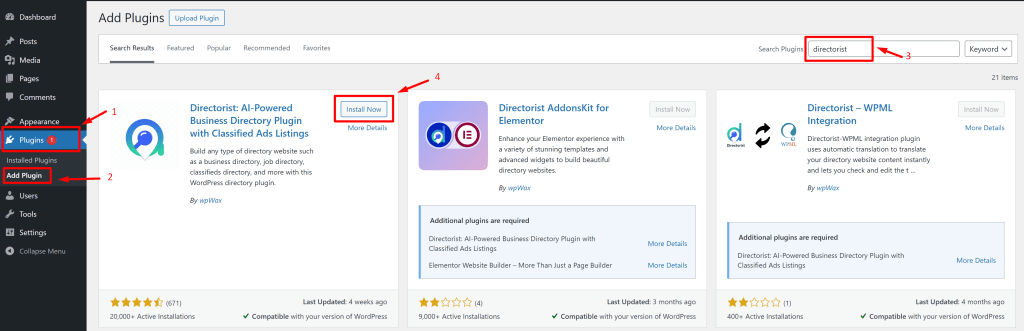
Once your WordPress is ready and you get the access to your backend dashboard, install and activate the “Directorist” plugin following the process:
WP Admin Dashboard > Plugins > Add New > Search for the keyword ‘directorist’ > Install the following plugin>Activate
How To Design a Classified Website That Looks Cool
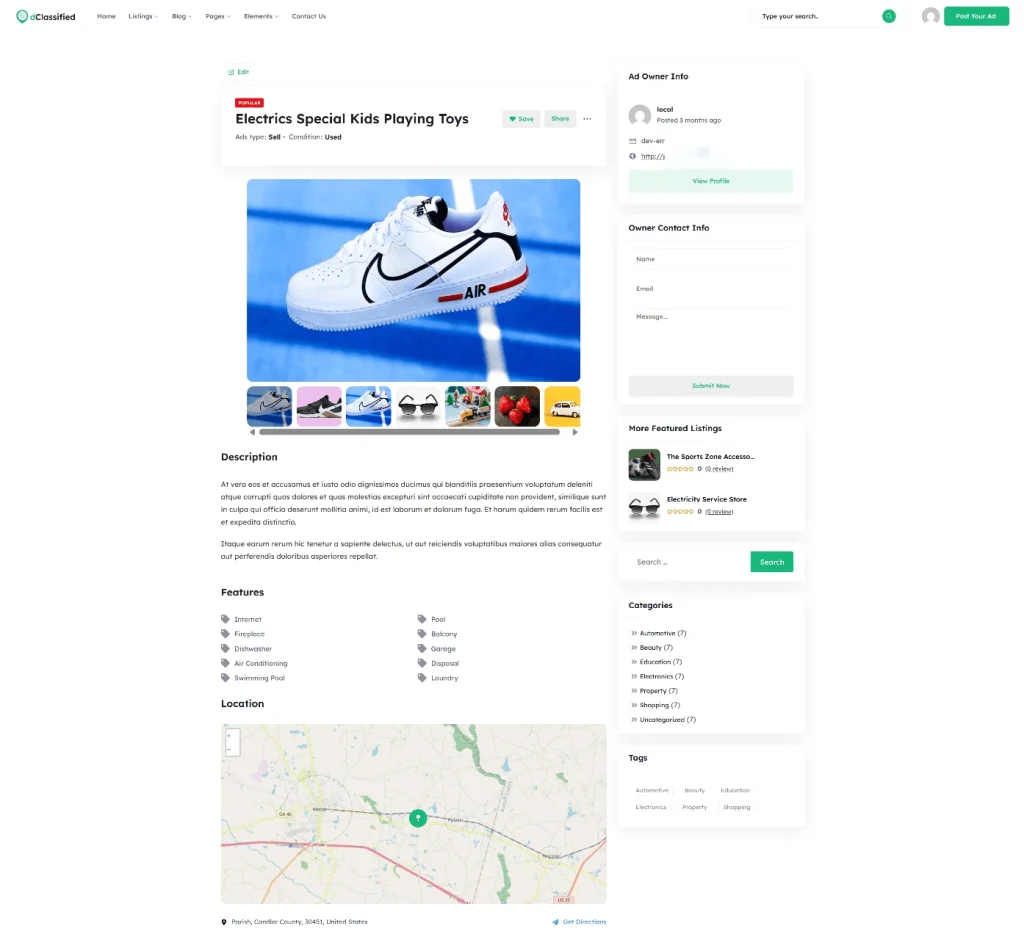
There are many themes available for customizing classified websites, but an optimized theme can add a premium appearance and push up your website to the next level. We’ll use the “dclassified“, which is a Directorist-based theme that is specially optimized for classified websites.
With a mere cost of only $69/1 site, it can power up your classified website for a year. If you have a bigger plan, then you can cut costs by taking the best fit package from different options. Before jumping to the next section, let’s have a featureful glance of dClassified.
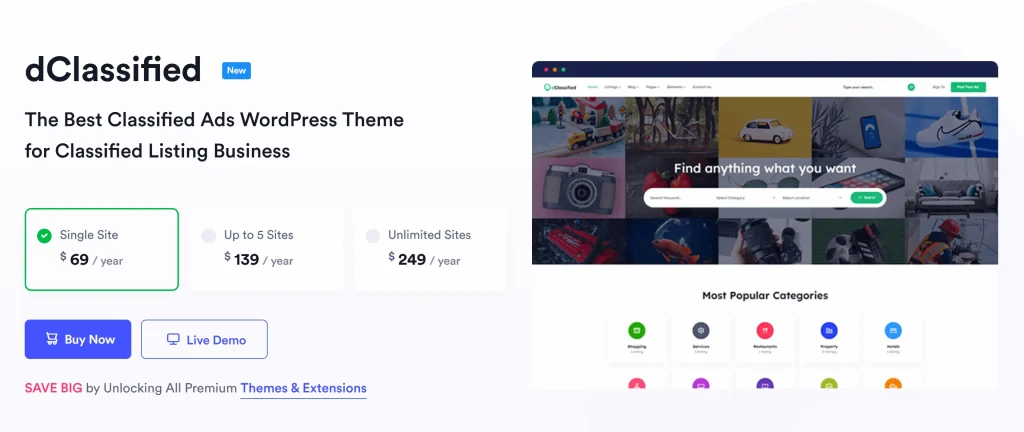
Insert a button here with the theme page link. Get dClassified Theme Now!
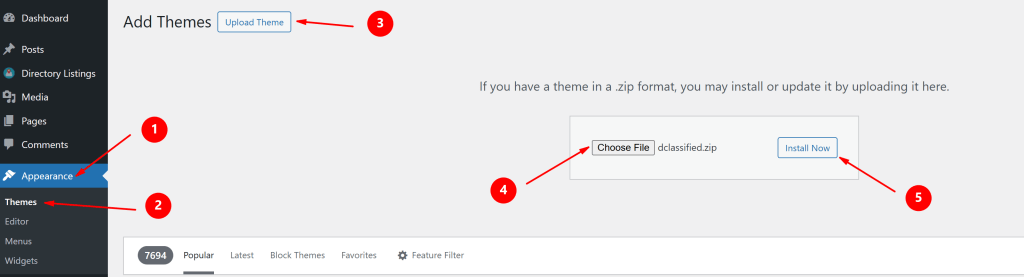
Let’s get back on track. You can easily download the theme from Directorist’s user account after purchasing your plan. Once you have the theme, navigate to the WP Admin Dashboard > Appearance > Themes > Add New.
Then click on Upload Theme > Choose File and select the ‘dclassified.zip’ > Install Now.
Now, activate the theme to take effect.
Create and Save Menu Of Classified Website
You can import the demo listing using the wpWax Demo Importer; this will add a common menu to make the task easier for you. For Demo Content Install,Select Tools>Demo Content Install. Make sure to keep a backup if you have any important data, as all data will be lost if you install demo data.
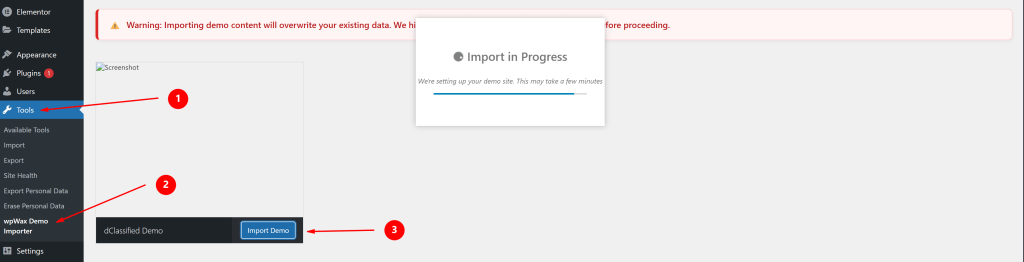
However, you can skip this process to create your own. To add a menu, go to Appearance> Menus>Create a new menu.
We recommend going with the Import option as it saves a lots of time, also offering customize options as per your choice.

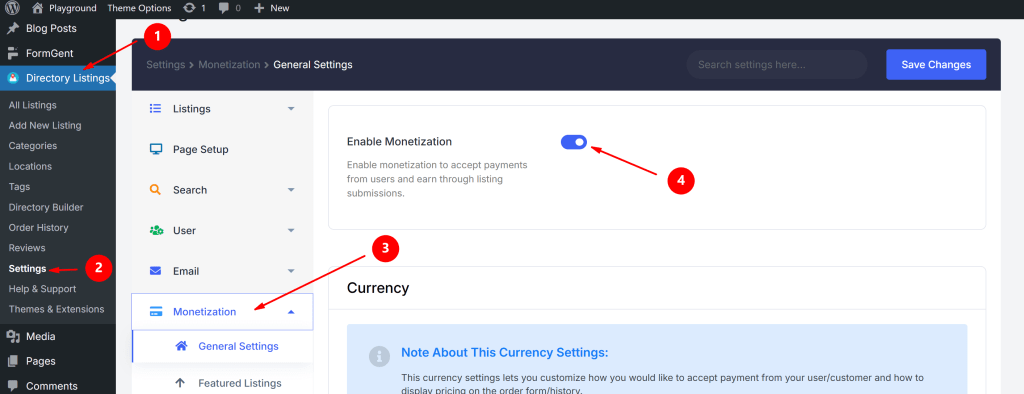
Turn the monetization feature on from the Directorist settings
Here comes the juicy part of Classified websites. Everyone wants to earn money from classified websites. Luckily, Directorist made this monetization feature easier, you will get the feature by default right after the installation. Again, you can setup the feature from
Note that with the free version, you can monetize only the featured listing. However, you can check out premium extensions like Pricing Plan and Rank Featured Listings for charging each listing.
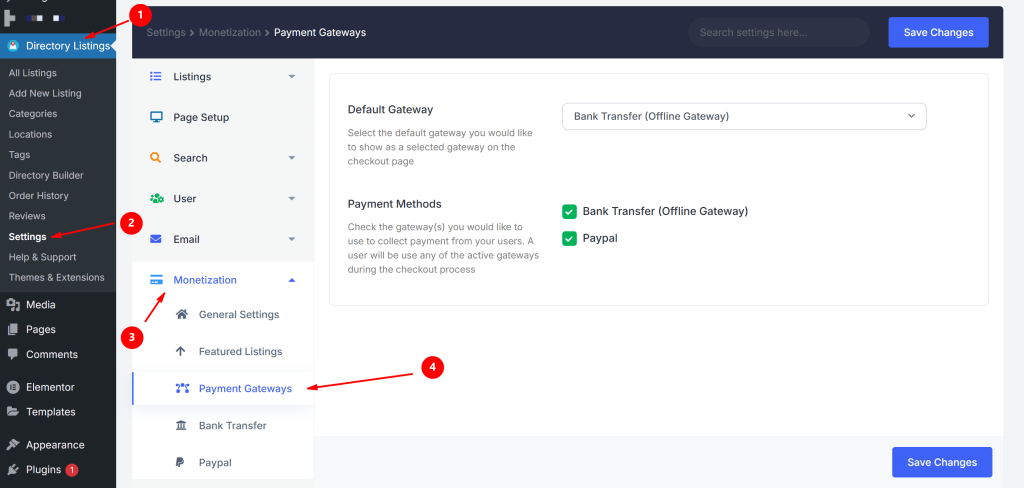
Set Up a Payment Gateway for Your Classified Website
To monetize your classified website, a payment gateway is a must. Directorist make the payment gateway process easier. You can use both offline payment gateway or other popular online gateways like Stripe, PayPal and Authorize.net.
To set up payment gateway: Directory Listing> Settings> Monetization> Payment Gateways
Make Your Classified More Organized
Organizing a classified directory is a crucial task. It is really important for both owner and visitors to find the specific ads. Organize your directory by creating categories, tags, location and add listing features. All the options you’ll find under Directory Listings.
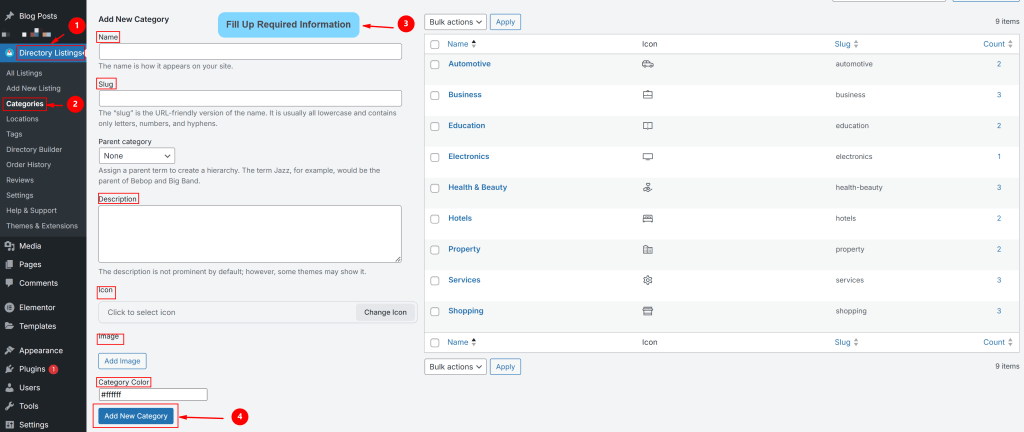
How To Add Category
For add new category on your classified website: Directory Listing>Categories>Fill the Fields>Click “Add New Category”
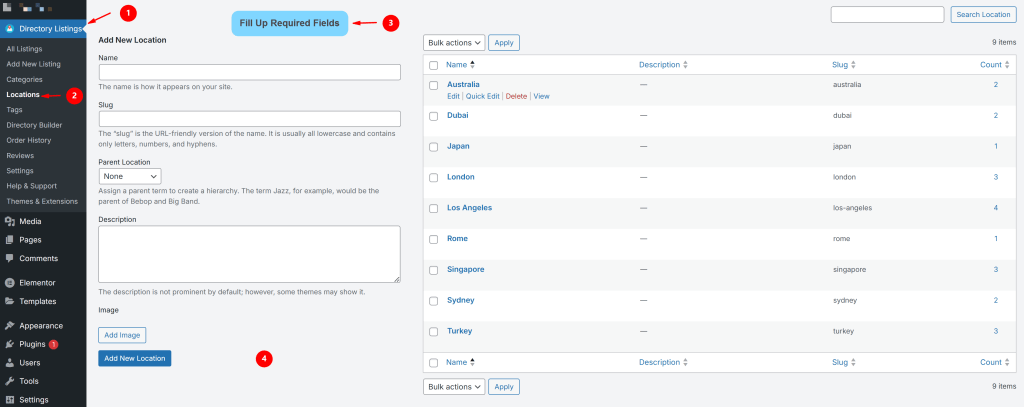
How To Add Location
For add new location on your classified website: Directory Listing>Locations>Fill the Fields>Click “Add New Location”
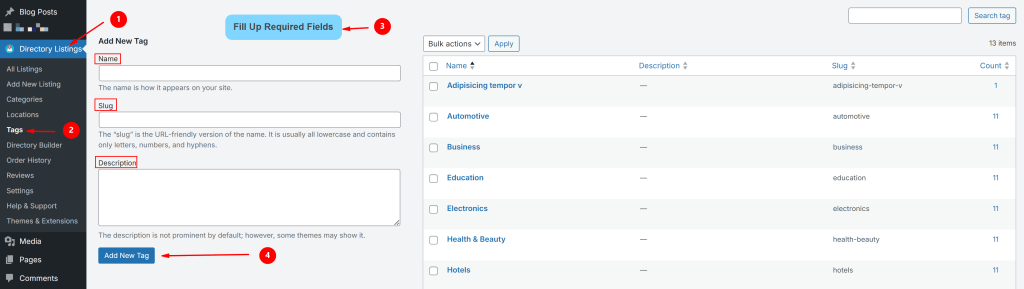
How To Add Tags
For add new tags on your classified website: Directory Listing>Tags>Fill the Fields>Click “Add New Tag”.
How to submit classified ads
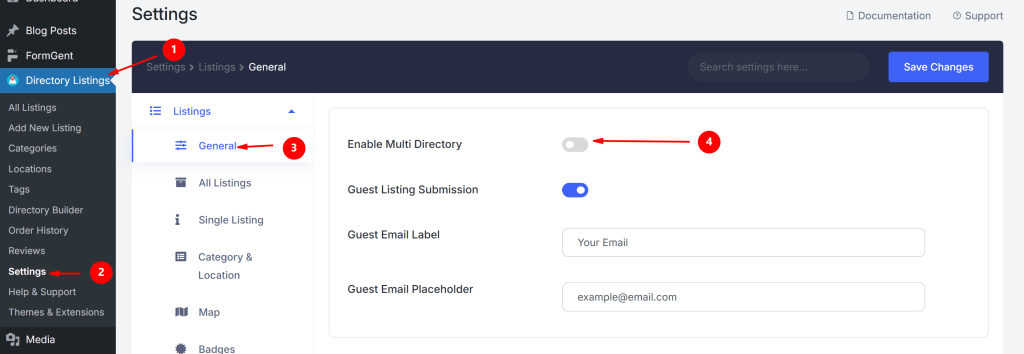
When a user visits your site, they need to click the “Add Listing” button to submit an ad. As usual, this process requires signing up and email confirmation, which sometimes irritates users. For this you can use “Guest Listing Submission”, which doesn’t require any sign-up process. This easy process attracts more users to submit their listings.
This option needs to be activated by following the process Settings>General>Enable “Guest Listing Submission”. After submitting all info, the user needs to hit the “Save & Preview” button to preview and finalise the process.
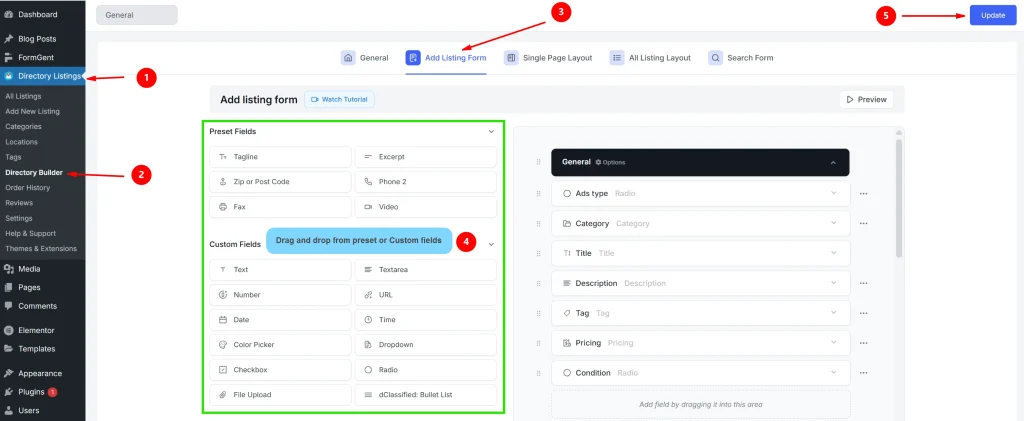
How To Customize Listing Form of Classified Website
The listing form is fully customizable, which means you can create the form as per your own preference. To customize the form, Directory Listings > Directory Builder > Single Listing Page Layout > Content > Drag and drop a field to the form > Hit the Save button.
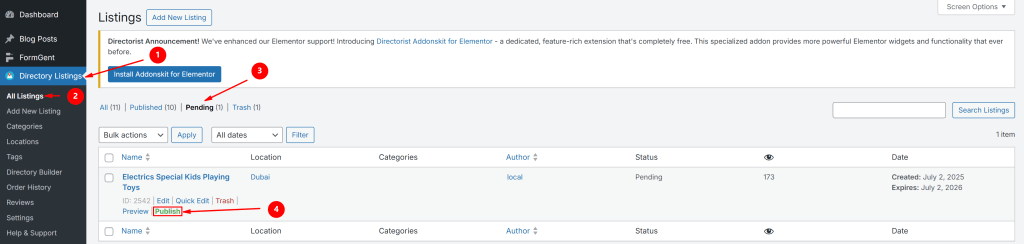
Review and Publish Ad
Here is the final part, review and publish the ad listing. To complete the process, navigate to Directory Listings > All Listings > Hover over the Pending Listing > Hit the ‘Publish’ button. After publishing the listings, all the published listings will appear in the “All Listings” Page.
Also Read: 18 Must-Have Free Best Tools For StartUp
What’s Next?
Building a classified website is not complicated today. You just need the right tools and strategy to build a successful Classified Website. With the Directorist plugin and the dClassified theme, you can easily create your dream Classified Website. Don’t wait any longer! If you really want to build a successful Classified Website, it’s high time to take action. Get started with Directorist & dClassified.